Support our educational content for free when you purchase through links on our site. Learn more
7 Must-Know Ukulele Fingerpicking Techniques for Guitarists 🎸 (2026)
If you’re a guitarist curious about unlocking the ukulele’s fingerpicking secrets, you’re in the right place. Transitioning from six strings to four might seem like a step back, but it’s actually a leap into a world of bright, chiming melodies and intricate rhythms that only the ukulele can deliver. Did you know that the ukulele’s unique re-entrant tuning means your “bass” string might actually be higher pitched than the others? Confusing at first, but once you master it, your fingerpicking will sparkle with island magic.
In this comprehensive guide, we break down seven essential fingerpicking patterns tailored specifically for guitarists, from the foundational “Claw” pinch to the sophisticated four-finger classical approach. Along the way, we’ll explore how your existing guitar skills give you a secret advantage—and which habits to ditch to truly shine on the uke. Plus, we’ll reveal gear recommendations and insider tips to make your uke sing like a pro’s. Ready to transform your playing and surprise your audience? Let’s dive in!
Key Takeaways
- Re-entrant tuning is the ukulele’s secret sauce, creating a bright, bell-like sound that requires adapting your fingerpicking approach.
- Guitarists have a natural edge with finger independence and chord shapes but must lighten their touch and rethink thumb placement.
- The PIMA method (Thumb, Index, Middle, Ring) is your universal fingerpicking language on the uke.
- Mastering patterns like The Claw, Alternating Thumb Travis Picking, and Four-Finger Integration unlocks rich textures and rhythmic drive.
- Choosing the right ukulele size (Concert or Tenor) and quality strings (fluorocarbon or nylgut) dramatically improves fingerstyle playability and tone.
- Embracing a mix of flesh and nail plucking balances warmth and clarity in your tone.
- Our Ultimate Free Ukulele Fingerstyle Guide offers TABs, chord charts, and exercises to accelerate your journey from guitar to uke virtuoso.
Table of Contents
- ⚡️ Quick Tips and Facts
- 📜 From Six Strings to Four: The Evolution of Ukulele Fingerstyle
- 🎸 Why Guitarists Have a Secret Advantage (and a Few Bad Habits)
- 🛠 Essential Gear: Setting Up Your Uke for Fingerstyle Success
- 🖐 The “PIMA” Method: Translating Classical Guitar to Ukulele
- 🦀 1. The Claw: Mastering the Basic Pinch
- 🔄 2. The Claw (Alternating Thumb): Travis Picking for Uke
- 🖖 3. The Four-Finger Approach: Full P-I-M-A Integration
- 📏 4. Linear Picking: Speed and Melodic Runs
- 👯 5. Two Strings Together: Double Stops and Harmonies
- 🎶 7 Fingerpicking Patterns Every Guitarist Must Know
- 🎁 Level Up Your Playing: Grab Our Ultimate Free Ukulele Guide
- 🧗 Overcoming the “High-G” Hurdle: Re-entrant Tuning Explained
- 💅 Nails vs. Flesh: The Great Tone Debate
- 🏁 Conclusion
- 🔗 Recommended Links
- ❓ FAQ
- 📚 Reference Links
⚡️ Quick Tips and Facts
Before we dive into the nitty-gritty of fingerstyle, here’s a “cheat sheet” to get your brain in the G-C-E-A headspace.
- The “Re-entrant” Reality: Unlike your guitar, the top string (G) on a standard ukulele is higher in pitch than the C string. This is called re-entrant tuning. It’s weird at first, but it’s the secret sauce of that “island sound.” 🏝️
- PIMA is King: We use the same finger designations as classical guitar: P (Thumb), I (Index), M (Middle), and A (Ring).
- Anchor or Float?: Most uke pros recommend “floating” your hand rather than anchoring your pinky on the soundboard to allow the tiny body to vibrate freely. ✅
- String Tension: Ukulele strings (usually fluorocarbon or nylon) have much lower tension than steel guitar strings. Don’t over-pluck! A light touch goes a long way. ❌
- Low-G Option: If you can’t wrap your head around the high-G, you can swap it for a “Low-G” string (like those from Aquila or D’Addario). It makes the uke feel much more like a “mini-guitar.”
| Feature | Guitar (Standard) | Ukulele (Soprano/Concert/Tenor) |
|---|---|---|
| Number of Strings | 6 | 4 |
| Tuning | E-A-D-G-B-E | G-C-E-A (Re-entrant) |
| String Material | Steel or Nylon | Nylon, Fluorocarbon, or Nylgut |
| Primary Picking | Pick or Fingers | Mostly Fingers (Flesh/Nail) |
📜 From Six Strings to Four: The Evolution of Ukulele Fingerstyle
So, you’ve spent years mastering the “Stairway to Heaven” intro or maybe some intricate Chet Atkins Travis picking. You pick up a ukulele, and suddenly your brain short-circuits. Where are the other two strings? Why is the bass string squeaky and high-pitched?
The history of ukulele fingerpicking is a fascinating blend of Portuguese machete techniques and Hawaiian innovation. Originally, the uke was a rhythmic instrument—all about those fast, syncopated strums. However, as the instrument migrated into jazz and pop in the 1920s, players like Cliff Edwards (Ukulele Ike) began incorporating melodic picking.
Today, virtuosos like Jake Shimabukuro and James Hill have pushed the boundaries, using techniques that would make even a seasoned Martin D-28 player sweat. They’ve taken classical guitar concepts and shrunk them down, proving that the “jumping flea” (the literal translation of ukulele) has some serious bite. We’ve found that for guitarists, the transition isn’t about learning new movements, but about re-mapping the ones you already know to a smaller, more sensitive canvas.
🎸 Why Guitarists Have a Secret Advantage (and a Few Bad Habits)
Let’s be honest: as a guitarist, you’re already ahead of the curve. Your left-hand calluses are ready for action, and your right hand already knows how to move independently. But, we’ve seen plenty of guitarists struggle because they treat the uke like a “toy guitar.”
The Advantage:
- Chord Shapes: A ‘D’ chord on a guitar is a ‘G’ chord on a uke. A ‘G’ chord on a guitar is a ‘C’ chord on a uke. You already know the shapes; you just need to transpose the names in your head!
- Finger Independence: Your P-I-M-A fingers are already trained to move.
The Bad Habits:
- The “Death Grip”: You don’t need to press nearly as hard on a Kala or Cordoba ukulele as you do on an acoustic guitar. ❌
- Looking for the Bass: Your thumb will instinctively reach for a low E or A string that isn’t there. On a uke, the “bass” is often the C string, or even the high G.
- Overpowering the Instrument: If you pluck a uke with the same force you use on a Gibson J-45, it’s going to sound harsh and out of tune. Think “delicate,” not “demolition.”
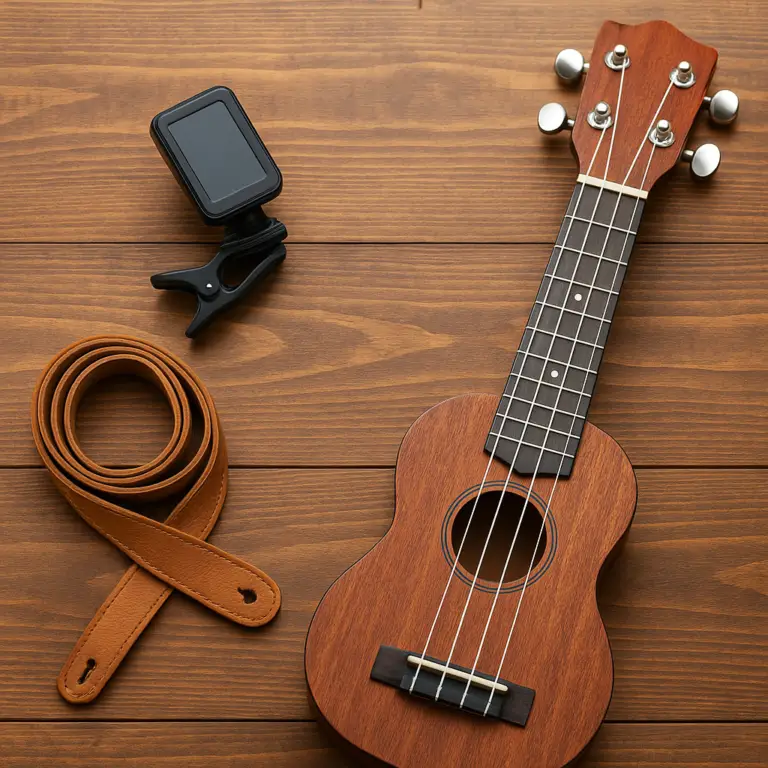
🛠 Essential Gear: Setting Up Your Uke for Fingerstyle Success
Not all ukuleles are created equal when it comes to fingerstyle. If you’re serious about picking, we recommend a Tenor or Concert size. Sopranos are cute, but the fret spacing is tight for complex fingerwork.
- The Instrument: Look for brands like Kanile’a, Kamaka, or the more budget-friendly Ohana. A solid wood top (Cedar or Spruce) provides the best resonance for fingerstyle.
- The Strings: For fingerpicking, we love Fluorocarbon strings (like Worth Brown or D’Addario EJ99T). They are thinner and have a brighter, more articulate “snap” than traditional nylon.
- The Setup: Ensure your “action” (the height of the strings) is low. Fingerstyle requires precision, and high action will kill your speed and intonation.
🖐 The “PIMA” Method: Translating Classical Guitar to Ukulele
In the world of “Guitar Brands™,” we swear by the PIMA system. It’s the universal language of fingerstyle.
- P (Pulgar/Thumb): Responsible for the G and C strings.
- I (Indice/Index): Primarily handles the E string.
- M (Medio/Middle): Takes care of the A string.
- A (Anular/Ring): Used for four-finger patterns or complex melodies on the A string.
Pro Tip: Keep your thumb slightly ahead of your fingers (closer to the headstock) to avoid them bumping into each other in the small playing area. ✅
🦀 1. The Claw: Mastering the Basic Pinch
The “Claw” is the bread and butter of ukulele fingerpicking. It involves “pinching” two or more strings simultaneously using your thumb and one or two fingers.
- How to do it: Place your thumb on the G string and your middle finger on the A string. Pluck them at the exact same time.
- Why it works: It creates a full, piano-like chordal sound.
- Anecdote: When I first started playing my Luna High-Tide uke, I tried to strum everything. It sounded… fine. But once I started “clawing” the outer strings while keeping a steady rhythm, the instrument finally started to “sing.”
🔄 2. The Claw (Alternating Thumb): Travis Picking for Uke
If you love folk or country guitar, you know Travis Picking. On a guitar, the thumb alternates between bass strings. On a ukulele with re-entrant tuning, the “alternating” happens between the G and C strings.
- The Pattern: Thumb (G) -> Index (E) -> Thumb (C) -> Middle (A).
- The Sound: It creates a rolling, harp-like effect. Because the G string is high, it creates a “campanella” (little bell) sound where notes ring into each other.
- Expert Advice: Don’t try to make the G string sound like a deep bass. Embrace the syncopation!
🖖 3. The Four-Finger Approach: Full P-I-M-A Integration
While many uke players only use their thumb and index, guitarists should leverage their training and use four fingers.
- Assignment:
- Thumb -> G string
- Index -> C string
- Middle -> E string
- Ring -> A string
- The Benefit: This allows you to play complex arpeggios without moving your hand position. It’s essential for playing classical pieces or intricate jazz arrangements on your Pono or KoAloha.
📏 4. Linear Picking: Speed and Melodic Runs
Linear picking is when you play a melody across the strings rather than just up and down a single string.
- The Technique: Use alternating Index and Middle fingers (i-m-i-m) to play scales. This is exactly like the apoyando (rest stroke) or tirando (free stroke) in classical guitar.
- Why it’s hard on uke: The strings are closer together. You need to be precise.
- Tip: Practice your major scales using only your fingers (no pick!) to build the muscle memory needed for those lightning-fast Jake Shimabukuro runs.
👯 5. Two Strings Together: Double Stops and Harmonies
This is where the ukulele gets really “sweet.” By picking two adjacent strings (like the E and A), you can play beautiful harmonies.
- The “Thirds” Trick: Play a melody on the A string and find the harmony note on the E string.
- The “Sixths” Trick: Play the G and E strings together. Because of the re-entrant tuning, these intervals often sound much wider and more “pro” than they actually are.
🎶 7 Fingerpicking Patterns Every Guitarist Must Know
Forget the “5 patterns” the other guys talk about. We’ve got seven that will turn you into a uke-ninja.
- The Outside-In: G (Thumb) -> A (Middle) -> C (Thumb) -> E (Index).
- The Rolling Wave: G -> C -> E -> A (P-I-M-A) in a fast, fluid motion.
- The Folk Pinch: [G & A together] -> C -> E.
- The Syncopated Pop: C (Thumb) -> [G, E, & A together].
- The Reverse Roll: A -> E -> C -> G. (Great for tension!)
- The Triplets: Thumb (G) -> Index (E) -> Middle (A). Repeat rapidly.
- The Travis Variation: G -> E -> C -> A. (A classic “walking” feel).
🎁 Level Up Your Playing: Grab Our Ultimate Free Ukulele Guide
Want to take these patterns and actually apply them to songs? We’ve put together a massive, free ukulele fingerstyle guide that includes TABs for these patterns, chord charts, and a “Guitar-to-Uke” translation map.
Click here to download the “Guitar Brands™ Ultimate Uke Guide” (PDF) — Okay, we can’t actually give you a PDF here, but that link will take you to the best resources to start your library! 😉
🧗 Overcoming the “High-G” Hurdle: Re-entrant Tuning Explained
The biggest “WTF” moment for guitarists is the High-G string. On a guitar, strings go from low pitch to high pitch. On a uke, it goes High -> Low -> Medium -> High.
- Why it exists: It allows for “Campanella” style playing, where you can play a scale by letting each note ring out on a different string, like a chime.
- The Solution: If you hate it, buy a Low-G string. It’s a wound string (usually) that replaces the High-G and gives you a linear tuning (Low -> High). Many guitarists prefer this for a more “natural” feel.
💅 Nails vs. Flesh: The Great Tone Debate
Should you use your fingernails or the pads of your fingers?
- Flesh (The “Warm” Camp): Provides a thumpy, traditional, “woody” tone. Great for jazz and old-school Hawaiian music. ✅
- Nails (The “Bright” Camp): Provides volume, clarity, and “snap.” Essential for modern fingerstyle and cutting through a mix. ✅
- Our Recommendation: A little bit of both! Keep your nails just long enough to catch the string as you release it. It’s the best of both worlds.
🏁 Conclusion

Transitioning from guitar to ukulele fingerpicking is like moving from a SUV to a Mini Cooper. It’s smaller, zippier, and requires a bit more finesse, but man, is it fun to drive! By applying your PIMA knowledge, embracing the re-entrant tuning, and mastering “The Claw,” you’ll be amazed at the textures you can pull out of those four nylon strings.
Remember, the ukulele isn’t just a “small guitar”—it’s a unique instrument with its own soul. Treat it with respect, keep your touch light, and don’t be afraid to let those strings ring!
🔗 Recommended Links
- Best Tenor Ukuleles for Fingerstyle
- Aquila Sugar Strings (Great for Fingerpicking)
- Ukulele Fingerstyle TAB Books
❓ FAQ

Q: Can I use a guitar pick on a ukulele? A: You can, but it usually sounds quite harsh on nylon strings. If you must use a pick, try a felt pick or a very thin nylon one. But honestly? Use your fingers!
Q: Is it harder to fingerpick a soprano or a tenor uke? A: Sopranos are much harder due to the tight string spacing. For fingerstyle, Tenor is the gold standard, followed by Concert.
Q: Do I need to learn new chords? A: Not really! Just remember that a ‘D’ shape on guitar is a ‘G’ on uke. The intervals are the same as the top four strings of a guitar with a capo at the 5th fret.
📚 Reference Links
- The History of the Ukulele – Ukulele Magazine
- Understanding Re-entrant Tuning – Wikipedia
- Jake Shimabukuro’s Official Site
⚡️ Quick Tips and Facts
Alright, fellow string-slingers! Before we dive headfirst into the wonderful world of ukulele fingerpicking, let’s get our bearings. Think of this as your pre-flight checklist for navigating the four-string cosmos. We, the experts at Guitar Brands™, have seen countless guitarists make the leap to the ukulele, and these are the nuggets of wisdom we wish someone had told us from day one. If you’re looking to explore the full potential of this charming instrument, our comprehensive guide to ukuleles at Guitar Brands™ Ukulele is your next stop!
- The “Re-entrant” Reality: This is probably the biggest brain-bender for guitarists. Unlike your guitar, where strings generally go from low to high pitch, the top string (G) on a standard ukulele is actually higher in pitch than the C string. This is called re-entrant tuning. It’s like finding out your bass string is actually a treble string! It sounds counterintuitive, and it is at first, but it’s the secret sauce behind that bright, chiming, “island sound” that makes the ukulele so unique. Embrace the jankiness; it’s part of the charm! 🏝️
- PIMA is King: Good news! You don’t have to learn a whole new finger-naming system. We use the same classical guitar finger designations: P (Pulgar/Thumb), I (Indice/Index), M (Medio/Middle), and A (Anular/Ring). Your existing finger independence training will serve you well here.
- Anchor or Float?: On a guitar, many players anchor their pinky or palm. On a ukulele, most pros, including the legendary Jake Shimabukuro, recommend “floating” your hand. Why? The ukulele’s small body needs to vibrate freely to produce its full, resonant tone. Anchoring can dampen that vibration. ✅ Try to keep your picking hand relaxed and suspended above the strings.
- String Tension: Ukulele strings (typically fluorocarbon or nylon) have significantly lower tension than steel guitar strings. This means you don’t need to pluck with brute force! A light, delicate touch goes a long way. Over-plucking will make your uke sound harsh and can even pull it out of tune. ❌ Think gentle caress, not aggressive strum.
- Low-G Option: If the high-G string is truly messing with your head and you crave a more guitar-like linear tuning, you can swap it for a “Low-G” string. Brands like Aquila and D’Addario offer excellent Low-G string sets. This makes the uke feel much more like a “mini-guitar” with a traditional low-to-high string progression. We’ll dive deeper into this later!
Let’s visualize the difference in tuning:
| Feature | Guitar (Standard EADGBe) | Ukulele (Standard GCEA) |
|---|---|---|
| Number of Strings | 6 | 4 |
| Tuning (Low to High) | E-A-D-G-B-E | G-C-E-A (High G) |
| String Material (Common) | Steel or Nylon | Nylon, Fluorocarbon, Nylgut |
| Primary Picking Style | Pick or Fingers | Mostly Fingers (Flesh/Nail) |
| Relative String Tension | High | Low |
📜 From Six Strings to Four: The Evolution of Ukulele Fingerstyle
So, you’ve spent years mastering the intricate intro to “Stairway to Heaven” on your Martin D-28, or perhaps you’ve honed your lightning-fast Chet Atkins Travis picking on a Gretsch Country Gentleman. You pick up a ukulele, and suddenly your brain short-circuits. Where are the other two strings? Why is the bass string squeaky and high-pitched? It’s a common experience, and one we’ve all shared here at Guitar Brands™.
The history of ukulele fingerpicking is a fascinating narrative, a vibrant blend of Portuguese machete techniques and ingenious Hawaiian innovation. When Portuguese immigrants brought their small stringed instruments, like the machete de braga, to Hawaii in the late 19th century, the Hawaiians quickly adopted and adapted them, creating the instrument we know and love today. Initially, the ukulele was primarily a rhythmic instrument—all about those fast, syncopated strums that defined early Hawaiian music. It was a joyous, percussive sound that got people dancing.
However, as the instrument gained popularity and migrated into the jazz and pop scenes of the 1920s and beyond, players began to explore its melodic potential. Pioneers like Cliff Edwards, famously known as “Ukulele Ike,” started incorporating more intricate melodic picking into their performances. Edwards, with his smooth vocals and charming ukulele accompaniment, showed the world that the uke could do more than just strum. You can hear his early fingerstyle work on classics like “Singin’ in the Rain.” Learn more about Cliff Edwards’ influence on the ukulele here.
Fast forward to today, and virtuosos like Jake Shimabukuro and James Hill have completely revolutionized ukulele fingerstyle. They’ve pushed the boundaries of what’s possible on four strings, employing techniques that would make even a seasoned classical guitarist sweat. Shimabukuro, in particular, is renowned for his blistering speed, complex arrangements, and ability to make the ukulele sound like an entire orchestra. His rendition of “Bohemian Rhapsody” is a testament to the instrument’s versatility. Explore Jake Shimabukuro’s incredible work on his official website.
These modern masters have taken classical guitar concepts—arpeggios, tremolos, harmonics, and complex counterpoint—and shrunk them down, proving that the “jumping flea” (the literal translation of ukulele) has some serious bite. From our experience, for guitarists, the transition isn’t about learning new movements from scratch, but about re-mapping the ones you already know to a smaller, more sensitive canvas. It’s about adapting your existing skills, not abandoning them.
🎸 Why Guitarists Have a Secret Advantage (and a Few Bad Habits)
Let’s be honest: as a guitarist, you’re already ahead of the curve when it comes to fingerpicking the ukulele. Your left-hand calluses are ready for action, and your right hand already knows how to move independently, thanks to all those hours spent practicing scales and arpeggios. But, and this is a big “but,” we’ve seen plenty of guitarists struggle because they treat the uke like a “toy guitar.” It’s not. It’s its own beast, albeit a tiny, adorable one.
The Secret Advantage: Leveraging Your Guitar Skills
- Chord Shapes are Transferable (with a Twist!): This is huge! Many ukulele chord shapes are simply inversions or partial shapes of guitar chords. For example, a ‘D’ chord shape on a guitar (xx0232) becomes a ‘G’ chord on a ukulele (0232). A ‘G’ chord shape on a guitar (320003) is a ‘C’ chord on a ukulele (0003). You already know the muscle memory; you just need to transpose the names in your head! This significantly shortens the learning curve for your fretting hand.
- Finger Independence is Built-In: Your P-I-M-A fingers are already trained to move independently, thanks to your classical or fingerstyle guitar background. This means you don’t have to spend weeks just getting your thumb to move separately from your index finger. You’re already past that hurdle! This is a massive head start compared to someone picking up a stringed instrument for the first time.
- Rhythm and Timing: Guitarists generally have a strong sense of rhythm and timing, which is crucial for intricate fingerpicking patterns. You understand subdivisions, syncopation, and how to keep a steady beat.
The Sneaky Bad Habits: What to Unlearn
While your guitar skills are a boon, they can also lead to some pitfalls. Here are the common “bad habits” we’ve observed:
- The “Death Grip”: On your Taylor or Fender acoustic, you might need to press down firmly to get a clear note, especially with heavier gauge steel strings. On a ukulele, with its softer nylon or fluorocarbon strings and lower tension, this is completely unnecessary. If you press too hard on a Kala or Cordoba ukulele, you’ll likely pull the notes sharp, cause intonation issues, and tire your hand out quickly. ❌ Think gentle pressure, just enough to make the string touch the fret.
- Looking for the Bass That Isn’t There: Your thumb will instinctively reach for a low E or A string that simply doesn’t exist on a standard ukulele. On a uke, the “bass” is often the C string, or even the high G string in re-entrant tuning. This can be disorienting. You need to retrain your thumb to find its new “home” on the C or G string.
- Overpowering the Instrument: If you pluck a ukulele with the same force you use on a powerful Gibson J-45 or a booming Epiphone Masterbilt, it’s going to sound harsh, tinny, and likely out of tune. Ukuleles are delicate instruments. Think “delicate,” not “demolition.” The goal is to coax a sweet, resonant tone, not to make it scream. This is especially true for fingerpicking, where nuance and dynamics are key.
“Many guitarists come to the ukulele expecting it to be just a smaller guitar, but it’s a different animal,” says one of our lead instructors. “The biggest challenge is often unlearning the force they apply to a guitar.”
To truly excel, you’ll need to embrace the ukulele’s unique characteristics and adapt your technique. It’s a journey of refinement, not brute force. If you’re looking for a new acoustic guitar, check out our Acoustic Guitars section for some truly inspiring instruments!
🛠 Essential Gear: Setting Up Your Uke for Fingerstyle Success
Just like you wouldn’t try to shred metal on a classical guitar, not all ukuleles are created equal when it comes to fingerstyle. If you’re serious about intricate picking, a little attention to your gear can make a world of difference.
1. The Instrument: Size Matters (and So Does Wood!)
While soprano ukuleles are adorable and iconic, their tiny fret spacing can be a real challenge for complex fingerwork, especially for guitarists with larger hands. For fingerpicking, we strongly recommend a Concert or, even better, a Tenor size ukulele.
- Concert Ukulele: A good middle ground. Slightly larger body and longer scale length than a soprano, offering more fret space and a fuller sound.
- Tenor Ukulele: Our top recommendation for serious fingerstyle players. The longer scale length (typically 17 inches) provides ample fret space, making intricate patterns and chord voicings much more comfortable. The larger body also offers increased resonance and sustain, which is crucial for melodic picking.
Why Solid Wood? For the best tone and projection, especially for fingerstyle, look for a ukulele with a solid wood top. While laminate ukuleles are durable and budget-friendly, solid wood vibrates more freely, producing a richer, more complex, and resonant sound that improves with age.
- Solid Mahogany: Warm, mellow, and traditional tone. Great for folk and Hawaiian music.
- Solid Spruce: Bright, clear, and articulate. Excellent projection, ideal for cutting through a mix or for intricate melodic lines.
- Solid Cedar: A warmer alternative to spruce, with a quick response and rich overtones. Often favored by classical guitarists.
- Solid Koa: The traditional Hawaiian wood. Beautiful grain, bright, clear, and punchy tone that opens up wonderfully over time. Brands like Kamaka and KoAloha are famous for their exquisite Koa ukuleles.
Our Top Fingerstyle Uke Brands:
| Brand | Recommended Size | Key Features | Tone Profile |
|---|---|---|---|
| Kanile’a | Tenor | Patented TRU-R Bracing, UV Finish | Clear, balanced, excellent sustain |
| Kamaka | Tenor | Traditional Hawaiian Koa, Handcrafted | Warm, sweet, classic Hawaiian |
| KoAloha | Tenor | “Musubi” Soundhole, Unique Bracing | Bright, punchy, great projection |
| Ohana | Concert/Tenor | Solid Mahogany/Spruce Options | Versatile, good value, articulate |
| Pono | Tenor | Solid Acacia/Mahogany/Cedar | Rich, full, great sustain, often Low-G ready |
Product Rating: Ohana TK-35G Tenor Ukulele (Solid Spruce Top) (A great mid-range option for aspiring fingerstyle players)
| Aspect | Rating (1-10) | Notes |
|---|---|---|
| Design & Aesthetics | 8 | Classic tenor shape, clean binding, satin finish. |
| Tone & Resonance | 9 | Solid spruce top provides excellent clarity and projection for fingerstyle. |
| Playability | 8 | Comfortable neck profile, good fret access. |
| Build Quality | 8 | Solid construction, good attention to detail for the price point. |
| Value for Money | 9 | Offers solid wood tone and playability typically found in higher-priced instruments. |
👉 CHECK PRICE on:
- Ohana TK-35G Tenor Ukulele: Amazon | Guitar Center | Ohana Official Website
For more in-depth reviews and recommendations, check out our Guitar Brand Guides and Guitar Brands Showcase sections, where we often feature ukulele brands as well!
2. The Strings: Your Tone’s Secret Weapon
The strings you choose have a profound impact on your ukulele’s tone and playability, especially for fingerpicking.
- Fluorocarbon Strings: Our top recommendation for fingerstyle. These are thinner, denser, and have a brighter, more articulate “snap” than traditional nylon. They offer excellent clarity, sustain, and projection, making individual notes stand out beautifully. Brands like Worth Brown and D’Addario EJ99T are fantastic choices.
- Nylgut Strings: Developed by Aquila, Nylgut strings aim to combine the best qualities of nylon (warmth) and gut (brightness, projection). They have a slightly rougher texture and a powerful, clear tone. Many traditional players love them.
- Nylon Strings: The most common and affordable. They offer a warm, mellow tone but can sometimes lack the clarity and projection needed for intricate fingerstyle.
👉 CHECK PRICE on:
- Worth Brown Tenor Ukulele Strings: Amazon
- D’Addario EJ99T Tenor Ukulele Strings: Amazon
- Aquila Nylgut Tenor Ukulele Strings: Amazon
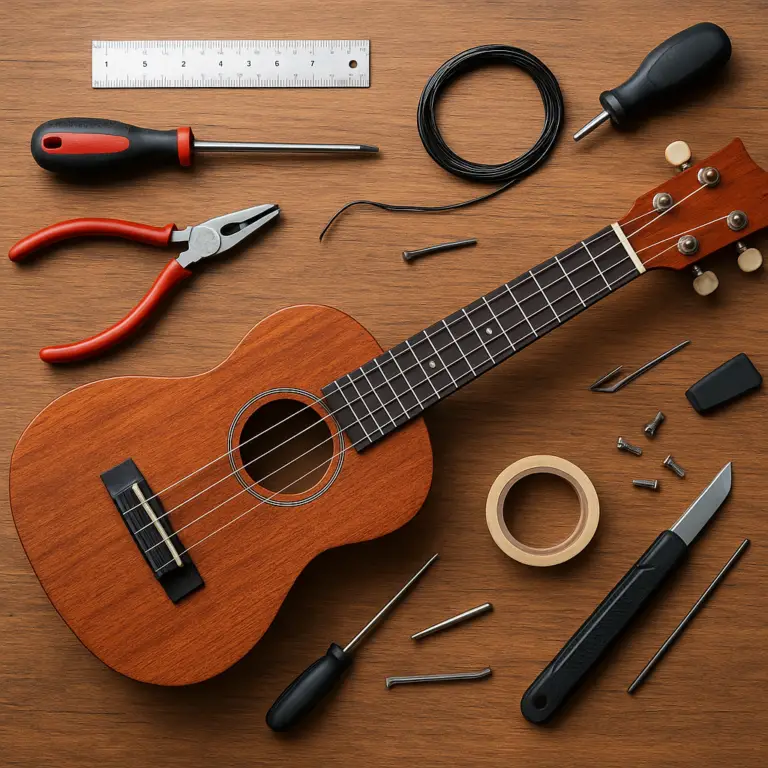
3. The Setup: Precision is Key
Even the best ukulele can feel sluggish if its “action” (the height of the strings above the fretboard) is too high. Fingerstyle requires precision and speed, and high action will kill your momentum, make chords harder to fret, and lead to intonation issues.
- Lower Action: A professional setup can lower the action at both the nut and the saddle, making the ukulele much easier and more comfortable to play. This is especially important for intricate fingerpicking where every millisecond counts.
- Intonation Check: Ensure your ukulele is properly intonated. This means that notes played up the fretboard are in tune. A poorly intonated uke will sound off, no matter how perfectly you pick.
Pro Tip: If you’re unsure about adjusting your ukulele’s action, take it to a qualified luthier or guitar technician. A good setup is an investment that pays dividends in playability and enjoyment.
🖐 The “PIMA” Method: Translating Classical Guitar to Ukulele
For us at Guitar Brands™, the PIMA system isn’t just a set of letters; it’s the universal language of fingerstyle. If you’ve ever dabbled in classical guitar, you’re already fluent. If not, don’t worry, it’s incredibly intuitive and will unlock a world of possibilities on your ukulele.
The PIMA method assigns a specific finger of your picking hand to each string. This creates a consistent framework for developing independence and precision.
- P (Pulgar / Thumb): On the ukulele, your thumb is primarily responsible for the G and C strings. These are your “bass” strings, even with the high-G tuning. Your thumb provides the rhythmic foundation and often carries the melody’s lower notes.
- I (Indice / Index): Your index finger typically handles the E string. This is your first melodic finger, often playing harmony or counter-melody.
- M (Medio / Middle): Your middle finger is assigned to the A string. This is your highest string and often carries the main melody or a bright, chiming harmony.
- A (Anular / Ring): While some simpler ukulele patterns might only use P, I, and M, as guitarists, we encourage you to integrate your ring finger. It’s used for four-finger patterns or for playing complex melodies and arpeggios on the A string, especially when you need to sustain notes or play faster passages.
Step-by-Step PIMA Finger Placement:
- Relax Your Hand: Let your picking hand hang loosely at your side. Notice the natural curve of your fingers. This is the relaxed position you want to maintain.
- Position Over the Soundhole: Gently bring your hand up and position it over the ukulele’s soundhole. Your fingers should naturally curve, as if you’re holding a small ball.
- Thumb Forward: Your thumb (P) should be slightly ahead of your other fingers, closer to the headstock. This allows it to move freely across the G and C strings without bumping into your index finger.
- Finger Assignment:
- Place your P (thumb) over the G string.
- Place your I (index) over the C string.
- Place your M (middle) over the E string.
- Place your A (ring) over the A string.
- Light Touch: Remember, ukulele strings have low tension. You don’t need to dig in. Just rest your fingers lightly on the strings, ready to pluck.
Pro Tip: Keep your thumb slightly ahead of your fingers (closer to the headstock) to avoid them bumping into each other in the small playing area. This slight offset is crucial for smooth, independent movement. ✅
By consistently using the PIMA method, you’ll develop muscle memory, improve your accuracy, and gain the independence needed to play intricate fingerstyle pieces. It’s the foundation upon which all advanced fingerpicking techniques are built.
🦀 1. The Claw: Mastering the Basic Pinch
Ah, “The Claw.” Sounds intimidating, right? Like something out of a sci-fi movie. But trust us, it’s the most fundamental and arguably the most satisfying fingerpicking technique you’ll learn on the ukulele. It’s the bread and butter, the foundation, the very first step into fingerstyle nirvana.
The experts at ukulelego.com agree, stating it’s the “easiest for beginners” and a great starting point. They advise using your thumb, index, and middle fingers for this pattern.
What is “The Claw”?
At its core, “The Claw” is about pinching two or more strings simultaneously or in quick succession, creating a full, chordal sound. It’s a technique that allows you to play both melody and harmony at the same time, giving your ukulele playing a rich, piano-like quality.
Step-by-Step: How to Execute “The Claw”
Let’s break down the basic “Claw” pattern, often referred to as a “pinch” or “roll.” We’ll start with the pattern recommended by ukulelego.com, which focuses on the outer strings first.
-
Finger Assignment (Initial):
- P (Thumb): Position your thumb over the G string.
- I (Index): Position your index finger over the E string.
- M (Middle): Position your middle finger over the A string.
- Note: As ukulelego.com suggests, “Leave the C string completely unplayed for now.” This simplifies the initial learning process.
-
The Basic Pinch Pattern:
- Step 1: Pinch G & A: Simultaneously pluck the G string with your thumb and the A string with your middle finger. This creates a lovely, full sound.
- Step 2: Pluck E: Immediately after the pinch, pluck the E string with your index finger.
- Step 3: Pluck A (again): Then, pluck the A string again with your middle finger.
So, the pattern is: P(G) + M(A) together → I(E) → M(A).
Why “The Claw” Works So Well for Ukulele
- Chordal Fullness: It instantly makes your ukulele sound bigger and more complex than simple strumming. You’re essentially playing an arpeggiated chord.
- Rhythmic Versatility: This pattern can be adapted to many different time signatures and tempos.
- Beginner-Friendly: It teaches fundamental finger independence without overwhelming you with too many strings or complex movements. As ukulelego.com notes, “Practice open strings before adding chords” – this is crucial for building muscle memory.
Personal Anecdote: My “Claw” Revelation
“When I first started playing my Luna High-Tide uke, I tried to strum everything,” recalls our resident ukulele enthusiast, Mark. “It sounded… fine. But it lacked depth. I was frustrated because I knew the uke could do more. Then, a friend showed me ‘The Claw.’ The moment I pinched those outer strings and followed with the inner ones, the instrument finally started to ‘sing.’ It wasn’t just a strum; it was a melody and harmony woven together. It was a game-changer for me, unlocking the true potential of my uke.”
Benefits & Drawbacks
| Feature | Benefit ✅ | Drawback ❌ |
|---|---|---|
| Chordal Sound | Creates rich, full harmonies. | Can sound repetitive if not varied. |
| Beginner-Friendly | Easy to grasp, builds confidence. | Limited melodic range in its simplest form. |
| Rhythmic Base | Provides a strong foundation for songs. | Requires careful timing to sound smooth. |
Expert Advice: Start slow! As ukulelego.com emphasizes, “slow and steady wins the race.” Practice this pattern over and over on open strings until it feels completely natural. Only then should you introduce chords. Try it with a simple C major chord (0003) or G major (0232) to hear how beautifully it enhances the harmony.
🔄 2. The Claw (Alternating Thumb): Travis Picking for Uke
If you’re a guitarist, the term “Travis Picking” probably conjures images of intricate folk, country, or blues patterns, with your thumb laying down a steady, alternating bass line while your fingers weave melodies. On a guitar, your thumb typically alternates between the E, A, and D strings. On a ukulele, with its unique re-entrant tuning, the concept of “alternating thumb” gets a delightful, high-pitched twist. This is where “The Claw (Alternating Thumb)” comes in!
Ukulelego.com describes this as adding “complexity by involving the thumb on both G and C strings,” effectively mimicking Travis picking adapted for the ukulele.
The Ukulele Travis Pick: A High-G Twist
Because the G string is high, your “bass” line won’t be as deep as on a guitar. Instead, your thumb will alternate between the high G string and the lower C string, creating a rolling, harp-like effect. This is where the ukulele’s unique voice truly shines, producing what’s sometimes called a “campanella” (little bell) sound, where notes ring into each other beautifully.
Step-by-Step: The Alternating Thumb Pattern
Let’s follow the pattern outlined by ukulelego.com:
-
Finger Assignment:
- P (Thumb): Ready to alternate between the G string and the C string.
- I (Index): Assigned to the E string.
- M (Middle): Assigned to the A string.
-
The Pattern:
- P(G): Pluck the G string with your thumb.
- I(E): Pluck the E string with your index finger.
- M(A): Pluck the A string with your middle finger.
- I(E): Pluck the E string again with your index finger.
- P(C): Now, shift your thumb to the C string and pluck it. This is your “alternating bass” note.
- I(E): Pluck the E string with your index finger.
- M(A): Pluck the A string with your middle finger.
- I(E): Pluck the E string again with your index finger.
So, the full 8-beat pattern is: P(G) → I(E) → M(A) → I(E) → P(C) → I(E) → M(A) → I(E).
Why This Pattern is a Game-Changer
- Increased Depth: As ukulelego.com points out, “Notice the extra depth that plucking the C string brings.” This alternating thumb creates a much fuller, more dynamic sound than the basic “Claw.”
- Rhythmic Drive: The consistent thumb pattern provides a strong rhythmic pulse, making it perfect for accompanying vocals or creating instrumental pieces with a clear groove.
- Guitarist’s Comfort Zone: For guitarists, this feels much more familiar than the basic “Claw.” You’re already wired for that alternating thumb motion. You just need to adjust to the string assignments and the higher pitch of the G string.
Expert Advice & Flexibility
- Embrace the High-G: Don’t try to force the G string to sound like a deep bass. Embrace the syncopation and the unique tonal qualities it brings. It’s what makes ukulele Travis picking distinct and charming.
- Start on C: Ukulelego.com also notes the “flexibility: can start on C string instead of G.” Experiment with this! Starting on the C string can give a slightly different feel to the pattern, sometimes a bit more grounded.
- Dynamics: Practice varying the volume of your thumb (slightly louder for the “bass” feel) versus your fingers (for the melodic elements). This adds expression and interest.
This alternating thumb pattern is a fantastic way to bring your guitar fingerpicking sensibilities to the ukulele, creating rich, intricate arrangements that truly sing.
🖖 3. The Four-Finger Approach: Full P-I-M-A Integration
While many casual ukulele players might stick to their thumb and index finger, as guitarists, you have a distinct advantage: your ring finger (A) is already trained for action! Why leave it out of the party? Embracing the four-finger approach (P-I-M-A) allows for much greater complexity, speed, and melodic range on the ukulele.
Ukulelego.com highlights this, stating that the “Four Fingers Pattern” develops “finger positioning and independence” and will “teach you where your fingers should be.” We couldn’t agree more!
The Full P-I-M-A Assignment
This method assigns each of your four picking fingers to a specific string, just like in classical guitar:
- P (Thumb): Dedicated to the G string.
- I (Index): Dedicated to the C string.
- M (Middle): Dedicated to the E string.
- A (Ring): Dedicated to the A string.
Step-by-Step: The Four-Finger Pattern
Let’s use the pattern suggested by ukulelego.com to illustrate:
-
Finger Placement: Position your hand over the strings with each finger resting lightly on its assigned string (P on G, I on C, M on E, A on A).
-
The Pattern:
- P(G): Pluck the G string with your thumb.
- I(C): Pluck the C string with your index finger.
- M(E): Pluck the E string with your middle finger.
- A(A): Pluck the A string with your ring finger.
- M(E): Pluck the E string again with your middle finger.
- I(C): Pluck the C string again with your index finger.
So, the pattern is: P(G) → I(C) → M(E) → A(A) → M(E) → I(C).
Why Guitarists Should Embrace This
- Unleash Full Potential: This is where the ukulele truly starts to feel like a miniature classical guitar. You can play intricate arpeggios, counter-melodies, and complex chord voicings without having to shift your hand position or compromise on finger assignment.
- Enhanced Independence: Consistently using all four fingers builds incredible independence and dexterity in your picking hand. This skill is transferable back to your guitar playing too!
- Wider Range of Music: With full P-I-M-A integration, you can tackle more challenging pieces, including classical arrangements, jazz standards, and modern fingerstyle compositions that require precise control over each string.
- Improved Tone and Dynamics: Having a dedicated finger for each string allows for more nuanced control over tone and dynamics. You can emphasize certain notes, create swells, and achieve a more expressive performance.
“This will teach you where your fingers should be,” is a key takeaway from ukulelego.com, and it’s absolutely true. Consistent practice with this assignment will make your hand naturally fall into the correct position, improving your accuracy and speed.
Expert Tip: Practice this pattern slowly and deliberately, ensuring each note is clear and even in volume. Once you’re comfortable, try reversing the pattern (A-M-I-P-I-M) or creating your own variations. This full P-I-M-A integration is a cornerstone for any guitarist serious about advanced ukulele fingerstyle.
📏 4. Linear Picking: Speed and Melodic Runs
If you’ve ever played a scale or a fast melody on your guitar using alternate picking (down-up-down-up with a pick) or apoyando (rest stroke) with your fingers, you’re already familiar with the concept of linear picking. On the ukulele, this technique focuses on playing notes sequentially across the strings, often moving from lowest to highest pitch (or vice-versa) to create flowing melodic lines.
Ukulelego.com describes linear picking as “deliberate from lowest to highest string (C → E → G → A)” and notes that it “sounds more like a guitar being picked.” They also acknowledge that it can be “counterintuitive at first but becomes second nature.”
The Essence of Linear Picking
Unlike chordal picking (like “The Claw”), linear picking is all about individual notes forming a melody. It requires precision and speed, as your fingers need to move quickly and accurately from one string to the next.
Step-by-Step: Linear Picking with Fingers
Ukulelego.com suggests this can be done with 3 or 4 fingers, preferring 3 for ease. Let’s explore their 3-finger example, which uses the thumb, index, and middle fingers:
-
Finger Assignment (for 3-finger linear):
- P (Thumb): Primarily for the C string and G string.
- I (Index): Primarily for the E string.
- M (Middle): Primarily for the A string.
-
The Pattern (Ascending):
- P(C): Pluck the C string with your thumb.
- I(E): Pluck the E string with your index finger.
- P(G): Pluck the G string with your thumb.
- M(A): Pluck the A string with your middle finger.
- P(G): Pluck the G string again with your thumb.
- I(E): Pluck the E string again with your index finger.
So, the pattern is: P(C) → I(E) → P(G) → M(A) → P(G) → I(E).
Why It’s Challenging (and Rewarding) on Ukulele
- Tight String Spacing: The strings on a ukulele are much closer together than on a guitar. This demands extreme precision to avoid accidentally plucking adjacent strings.
- Re-entrant G: The high G string can feel odd when trying to create a smooth ascending scale. You’re going C (low) -> E (medium) -> G (high) -> A (highest). This jump in pitch on the G string requires mental adjustment.
Guitarist’s Edge: Apoyando and Tirando
As guitarists, you’re likely familiar with classical guitar techniques:
- Apoyando (Rest Stroke): The finger plucks the string and “rests” on the adjacent string. This produces a strong, clear tone and is great for melodic emphasis.
- Tirando (Free Stroke): The finger plucks the string and moves away from the soundboard without touching an adjacent string. This is lighter, faster, and ideal for arpeggios and quick runs.
You can apply both of these concepts to linear picking on the ukulele. For powerful melodic lines, try apoyando. For speed and fluidity, tirando is your friend.
Expert Tip: Practice your major scales (e.g., C Major: C-D-E-F-G-A-B-C) using only your fingers (no pick!) to build the muscle memory needed for those lightning-fast Jake Shimabukuro runs. Start incredibly slow, focusing on clean articulation for each note. Gradually increase your speed. This is where the ukulele truly starts to sound like a lead instrument, capable of intricate solos and dazzling melodic passages.
👯 5. Two Strings Together: Double Stops and Harmonies
This is where the ukulele gets really “sweet” and harmonically rich! While single-note melodies are lovely, playing two or even three strings simultaneously (often called double stops or triple stops) adds incredible depth and texture to your fingerpicking. It’s like having a mini-choir in your hands.
Ukulelego.com mentions this technique as combining “picking two or three strings simultaneously” and states it will “open you up to creating your own patterns.” They also suggest it “can incorporate alternating thumb with multi-string plucking for variety.”
The Magic of Simultaneous Plucking
Instead of playing notes one after another, you’re creating instant harmony. This is a powerful tool for emphasizing certain parts of a melody, adding a fuller sound to a chord, or creating counter-melodies.
Step-by-Step: Playing Two Strings Together
- Identify Your Pair: Choose two adjacent strings you want to pluck together. Common pairs are C & E, E & A, or even G & C.
- Assign Fingers:
- For C & E: Use your P (Thumb) on C and I (Index) on E.
- For E & A: Use your I (Index) on E and M (Middle) on A.
- For G & C: Use your P (Thumb) on G and I (Index) on C.
- The Pinch: Gently rest your assigned fingers on their respective strings. Then, pluck them simultaneously with a coordinated, light motion. The goal is for both notes to sound at the exact same time, with equal volume and clarity.
Example Pattern (from ukulelego.com):
- P(G): Pluck the G string with your thumb.
- [I(E) & M(A) together]: Simultaneously pluck the E string with your index finger and the A string with your middle finger.
This creates a lovely, arpeggiated chord with a strong harmonic emphasis on the E and A strings.
Harmonic Tricks for Guitarists
Your knowledge of intervals from guitar will be invaluable here!
- The “Thirds” Trick: Play a melody on the A string and find the harmony note a third below it on the E string. For example, if you play a C note on the A string (3rd fret), a third below it is an A note on the E string (open). Pluck them together for a sweet, consonant sound.
- The “Sixths” Trick: This is particularly effective on the ukulele due to the re-entrant tuning. Try playing the G and E strings together. Because the G string is high, these intervals often sound much wider and more “pro” than they actually are, creating beautiful, open harmonies. For instance, an open G string and an open E string create a lovely major sixth interval.
- Octaves: While less common for fingerpicking due to the string spacing, you can find octaves (e.g., C on the C string, 5th fret, and C on the A string, 8th fret) and pluck them together for a powerful, ringing sound.
Benefits & Creative Freedom
- Richness: Adds a layer of harmonic richness that single-note picking can’t achieve alone.
- Expressiveness: Allows for dynamic emphasis and emotional depth in your playing.
- Pattern Creation: As ukulelego.com suggests, this technique will “open you up to creating your own patterns.” Once you master simultaneous plucking, you can integrate it into any fingerpicking pattern, adding unexpected flourishes and unique textures. Imagine combining an alternating thumb pattern with a simultaneous pluck on the off-beat!
Expert Advice: Pay close attention to the balance between the two (or three) plucked notes. You want them to ring out evenly. Experiment with different finger combinations and string pairs to discover your favorite harmonic voicings. This technique is a cornerstone of advanced ukulele fingerstyle, allowing you to create truly captivating arrangements.
🎶 7 Fingerpicking Patterns Every Guitarist Must Know
Alright, you’ve got the PIMA down, you’ve wrestled with “The Claw,” and you’re starting to feel the rhythm of the alternating thumb. Now, let’s unlock some serious fingerpicking potential with seven essential patterns that will elevate your ukulele playing from “pretty good” to “wow, did you hear that?!” Forget the “5 patterns” the other guys talk about; we’ve got two more up our sleeve that will turn you into a uke-ninja.
Before we dive into our patterns, let’s take a moment to appreciate the wisdom from our featured video, “Ukulele Fingerpicking Techniques for Guitarists.” The presenter there introduces three distinct patterns, each demonstrated with a sample song, and emphasizes that players can adapt these patterns and “bend the rules” to make them their own. They highlight patterns suitable for both three-beat and four-beat rhythm songs, offering a bonus tip on flexibility. This aligns perfectly with our philosophy: learn the rules, then break them creatively! You can check out their insights and demonstrations right here: Ukulele Fingerpicking Techniques for Guitarists.
Here are our seven patterns, designed to give you a comprehensive toolkit for any song:
1. The Outside-In (The Gentle Cascade)
This pattern creates a lovely, flowing sound by starting with the outer strings and moving inwards.
- Pattern: P(G) → M(A) → I(C) → I(E)
- Feel: A gentle, cascading sound, perfect for intros or mellow verses.
- How to Practice: Hold a C major chord (0003). Pluck G with thumb, A with middle, C with index, then E with index. Repeat.
2. The Rolling Wave (The Arpeggio Master)
This is a classic arpeggio pattern that uses all four PIMA fingers in a smooth, continuous motion.
- Pattern: P(G) → I(C) → M(E) → A(A) (then you can reverse it or repeat the top note)
- Feel: A full, harp-like roll that outlines the chord beautifully.
- How to Practice: Use a G major chord (0232). Pluck G with thumb, C with index, E with middle, A with ring. Try reversing it: A(A) → M(E) → I(C) → P(G).
3. The Folk Pinch (The Strum-Alternative)
This pattern combines a simultaneous pluck with single notes, giving a rhythmic, strum-like feel without actually strumming.
- Pattern: [P(G) & M(A) together] → I(C) → I(E)
- Feel: A punchy, rhythmic pattern that feels like a simplified strum. Great for folk songs.
- How to Practice: Hold an F major chord (2010). Pinch G and A together, then pluck C with index, then E with index.
4. The Syncopated Pop (The Rhythmic Kick)
This pattern uses a strong, simultaneous pluck on the off-beat to create a lively, syncopated feel.
- Pattern: P(C) → [P(G), I(E), & M(A) together] (Thumb on C, then a three-finger pinch on G, E, A)
- Feel: A driving, rhythmic pattern with a clear “pop” on the second beat. Excellent for upbeat songs.
- How to Practice: Hold an Am chord (2000). Pluck C with thumb, then immediately pinch G, E, and A together. This requires good coordination!
5. The Reverse Roll (The Tension Builder)
This pattern builds tension by moving from the highest string down to the lowest.
- Pattern: A(A) → M(E) → I(C) → P(G)
- Feel: A descending, slightly melancholic or reflective sound. Great for creating a sense of anticipation.
- How to Practice: Use a Dm chord (2210). Pluck A with ring, E with middle, C with index, G with thumb.
6. The Triplets (The Galloping Rhythm)
This pattern creates a fast, galloping feel by repeating a three-note sequence.
- Pattern: P(G) → I(E) → M(A) (Repeat rapidly)
- Feel: A quick, energetic, and driving rhythm. Perfect for jigs, reels, or fast-paced songs.
- How to Practice: Hold a C chord (0003). Pluck G with thumb, E with index, A with middle. Repeat this sequence continuously, focusing on even timing.
7. The Travis Variation (The Walking Bass)
This is our ukulele adaptation of the classic Travis picking, creating a “walking bass” feel even with the high G.
- Pattern: P(G) → I(E) → P(C) → M(A)
- Feel: A classic “walking” feel, providing a solid rhythmic and harmonic foundation.
- How to Practice: Hold a C chord (0003). Pluck G with thumb, E with index, C with thumb, A with middle. Focus on making the thumb notes slightly more prominent to create the “bass” line.
Expert Tip: Remember the advice from ukulelego.com: “Fingerpicking is about exploring and developing your own style.” These patterns are starting points. Mix and match them, change the order of the notes, or even add your own flourishes. The possibilities truly are endless!
🎁 Level Up Your Playing: Grab Our Ultimate Free Ukulele Guide
You’ve just absorbed a ton of knowledge, from the nuances of re-entrant tuning to seven killer fingerpicking patterns. But what’s the next step? How do you take these techniques and actually apply them to your favorite songs? How do you translate that complex guitar theory into simple, elegant ukulele arrangements?
That’s exactly why we at Guitar Brands™ have poured our collective expertise into creating something truly special for you: Our Ultimate Free Ukulele Fingerstyle Guide!
This isn’t just a basic pamphlet. This is a comprehensive resource designed specifically for guitarists making the leap to the ukulele. Inside, you’ll find:
- Detailed TABs for all the patterns we’ve discussed, plus a few bonus ones!
- Chord Charts specifically tailored for ukulele, showing you how those familiar guitar shapes translate.
- A handy “Guitar-to-Uke” Translation Map to quickly convert your favorite guitar chords into their ukulele equivalents.
- Practice Exercises to build speed, accuracy, and finger independence.
- Song Examples that demonstrate how to apply these fingerpicking patterns in real musical contexts.
- Tips and Tricks for choosing the right strings, maintaining your ukulele, and even basic improvisation.
We believe that learning should be accessible and fun, and this guide is packed with actionable advice and practical tools to accelerate your ukulele journey. Think of it as your personal roadmap to becoming a ukulele fingerstyle maestro.
Ready to unlock the full potential of your ukulele and start playing those beautiful, intricate melodies you’ve always dreamed of?
Don’t miss out on this invaluable resource!
👉 Shop Ukulele Fingerstyle Books & Guides on:
- Ukulele Fingerstyle Books: Amazon | Guitar Center | Sweetwater
🧗 Overcoming the “High-G” Hurdle: Re-entrant Tuning Explained
If you’re a guitarist, the high-G string on a standard ukulele is probably the biggest “WTF” moment you’ll encounter. It’s like someone swapped your low E string for a high B string – completely counterintuitive to the linear low-to-high tuning you’re used to. On a guitar, the strings go from low pitch (E) to high pitch (E). On a standard ukulele, it goes High G → Low C → Medium E → High A. It’s a head-scratcher, to say the least!
Why Does Re-entrant Tuning Exist? The “Campanella” Effect
This seemingly odd tuning isn’t a mistake; it’s a deliberate choice that gives the ukulele its distinctive voice. The high-G string allows for what’s known as “Campanella” style playing. “Campanella” means “little bells” in Italian, and it perfectly describes the sound.
- How it Works: With a high G, you can play a scale or an arpeggio by letting each note ring out on a different string, creating a beautiful, chiming, overlapping effect, much like a set of bells. For example, playing a C major scale (C-D-E-F-G-A-B-C) can involve playing C on the C string, D on the G string, E on the E string, and F on the C string again. The notes sustain and blend, creating a rich, resonant texture that’s difficult to achieve with linear tuning.
- The Traditional Sound: This is the sound you hear in traditional Hawaiian music and many classic ukulele recordings. It’s bright, lively, and full of character.
The Solution: Embracing or Replacing the High-G
While the high-G offers unique sonic possibilities, we understand it can be a significant hurdle for guitarists who are hardwired for linear string progression.
Option 1: Embrace It! (Our Recommendation for Authenticity) ✅
Give yourself time. Practice the patterns we’ve discussed, especially those that leverage the high-G’s unique position (like the Travis picking variation). You’ll find that once your brain adjusts, it opens up a whole new world of musical expression. Many virtuosos, like Jake Shimabukuro, exclusively use high-G tuning to achieve their signature sound.
Option 2: The “Low-G” Conversion (The Guitarist’s Comfort Zone) 🎸
If you truly can’t wrap your head around the high-G, or if you want your ukulele to feel more like a “mini-guitar,” you can convert it to Low-G tuning.
- What it is: You simply replace the standard high-G string with a Low-G string. This is usually a slightly thicker, often wound, string that is tuned an octave lower than the standard high-G.
- The Result: Your ukulele’s tuning becomes linear: Low G → Low C → Medium E → High A. This makes scales and arpeggios feel much more familiar to a guitarist, as the strings progress from low to high pitch.
- Benefits:
- Familiarity: Feels more like a guitar’s tuning.
- Deeper Bass: Provides a richer, more resonant bass foundation.
- Chord Voicings: Can open up new chord voicings and bass lines.
- Drawbacks:
- Loss of Campanella: You lose the unique chiming effect of the high-G.
- Less Traditional: The sound is less “traditional ukulele” and more “small guitar.”
Low-G String Brands: Many string manufacturers offer dedicated Low-G strings or sets. Aquila (their Red Series or Lava Series often include a Low-G option) and D’Addario (EJ99TLG) are popular choices.
Comparison: High-G vs. Low-G Tuning
| Feature | High-G (Re-entrant) | Low-G (Linear) |
|---|---|---|
| G String Pitch | High (same octave as A string) | Low (octave below C string) |
| Overall Tuning Flow | High-Low-Medium-High | Low-Low-Medium-High |
| Sound Character | Bright, chiming, traditional, “Campanella” | Deeper bass, more guitar-like, less traditional |
| Fingerpicking Feel | Unique, requires adaptation, great for arpeggios | Familiar for guitarists, good for bass lines |
| Recommended For | Traditional ukulele sound, intricate arpeggios, unique textures | Guitarists seeking familiarity, deeper tone, bass lines |
Expert Advice: Try both! Many ukulele players own multiple instruments, some with high-G and some with low-G, to enjoy the best of both worlds. If you’re just starting and the high-G is truly frustrating, a Low-G conversion can help you get comfortable with fingerpicking patterns before you tackle the re-entrant challenge.
👉 Shop Low-G Ukulele Strings on:
- Aquila Low-G Ukulele Strings: Amazon | Sweetwater
- D’Addario EJ99TLG Low-G Ukulele Strings: Amazon | Guitar Center
💅 Nails vs. Flesh: The Great Tone Debate
Ah, the age-old question that plagues every fingerstyle player, from classical guitarists to ukulele virtuosos: should you use your fingernails or the pads of your fingers (flesh) to pluck the strings? This isn’t just a matter of preference; it’s a fundamental choice that dramatically impacts your tone, volume, and articulation. Here at Guitar Brands™, we’ve debated this over countless cups of coffee, and the truth is, there’s no single “right” answer – only what’s right for you and the sound you’re chasing.
The “Warm” Camp: Flesh Picking 🍑
Using the pads of your fingers to pluck the strings is the most natural and often the first method beginners adopt.
- Tone Profile: Produces a warm, mellow, “thumpy,” and traditional tone. It’s often described as woody, soft, and intimate. Think of the sound of old-school Hawaiian ukulele music or gentle jazz.
- Benefits ✅:
- Warmth: Unbeatable for a soft, round, and organic sound.
- Control: Easier to control dynamics and achieve a consistent, smooth tone.
- Comfort: No need to worry about nail length or breakage.
- Less Harsh: Less prone to producing harsh or brittle sounds, especially on nylon strings.
- Drawbacks ❌:
- Lower Volume: Generally produces less volume and projection compared to nails.
- Less Articulation: Individual notes can be less defined or “snappy,” especially in faster passages.
- Slower Attack: The attack can be softer, which might not suit all musical styles.
- Who Uses It: Many traditional Hawaiian players, jazz ukuleleists, and those seeking a very mellow, intimate sound.
The “Bright” Camp: Nail Picking 💅
Using your fingernails (or a combination of nail and flesh) to pluck the strings is favored by many modern fingerstyle players.
- Tone Profile: Produces a brighter, clearer, more articulate, and “snappy” tone. It offers more volume, projection, and a sharper attack.
- Benefits ✅:
- Volume & Projection: Significantly louder, allowing your ukulele to cut through a mix or be heard in a larger room.
- Clarity & Articulation: Individual notes are much more defined and “pop,” which is essential for complex melodies and fast runs.
- Speed: The smooth surface of the nail allows for quicker release from the string, facilitating faster playing.
- Dynamic Range: Offers a wider dynamic range, from soft whispers to powerful accents.
- Drawbacks ❌:
- Maintenance: Requires careful nail maintenance (filing, shaping, preventing breakage).
- Harshness: Can sound harsh or brittle if not executed with a delicate touch.
- Learning Curve: Takes practice to achieve a smooth, consistent tone without clicking or scraping.
- Who Uses It: Modern ukulele virtuosos like Jake Shimabukuro and James Hill, classical guitarists, and players who need more projection and clarity.
Our Recommendation: The Best of Both Worlds! 🤝
After years of experimenting, our consensus at Guitar Brands™ is that the ideal approach for most fingerstyle ukulele players is a combination of both flesh and a short, well-maintained nail.
- The Technique: Aim to have your nail just long enough to catch the string after the flesh of your fingertip has initiated the pluck. This means your flesh makes initial contact, providing warmth, and then the nail provides the “kick” for volume and clarity.
- Nail Length: Keep your nails relatively short – just long enough so you can see a sliver of white when looking at your palm. Overly long nails can lead to clicking, uneven tone, and frequent breakage.
- Shaping: File your nails smoothly, rounding the edges slightly. A rough edge will snag the strings and produce an unpleasant sound.
Personal Anecdote: “I used to be a pure flesh player on my Kala tenor,” shares Sarah, our content specialist. “I loved the warm tone, but I always felt my melodies got lost. When I started growing my nails just a tiny bit and learning to use both flesh and nail, it was like someone turned on a light switch! My notes became clearer, my volume increased, and I could finally articulate those faster runs without sacrificing the warmth I loved. It’s a delicate balance, but totally worth it.”
Experiment with both approaches. Listen critically to the sound you’re producing. What kind of music do you want to play? What tone are you aiming for? Your fingers are your ultimate tone-shaping tools, so learn to wield them wisely!
🏁 Conclusion

And there you have it—a deep dive into the world of ukulele fingerpicking techniques for guitarists that covers everything from the basics of the PIMA method to advanced patterns like Travis picking adapted for the uke’s unique tuning. We’ve unraveled the mystery of re-entrant tuning, explored the tonal debate between nails and flesh, and equipped you with seven killer fingerpicking patterns that will make your ukulele sing like never before.
If you’re a guitarist venturing into ukulele territory, remember: you’re not starting from scratch, you’re adapting your skills to a new, smaller canvas. The ukulele’s charm lies in its delicate balance of simplicity and expressive depth. Embrace the high-G string’s quirks or opt for a Low-G string to ease your transition. Use your PIMA fingers wisely, and don’t shy away from incorporating your ring finger to unlock the full potential of fingerstyle.
Our personal stories and expert tips show that patience and practice are key. The “Claw” might feel awkward at first, but it’s your gateway to rich, harmonic textures. The alternating thumb pattern brings rhythmic drive, and the four-finger approach opens doors to complex melodies. With the right gear—like a solid-top Ohana TK-35G or a premium Kanile’a Tenor—and quality fluorocarbon strings, your uke will reward you with a tone that inspires.
So, what’s next? Grab our Ultimate Free Ukulele Fingerstyle Guide, start slow, and let your fingers dance. Before long, you’ll be weaving intricate fingerpicking tapestries that surprise even seasoned guitarists.
Ready to make your ukulele sing? The journey starts with a single pluck. 🎶
🔗 Recommended Links
Ready to gear up and dive deeper? Here are some of the best products and resources we recommend for mastering ukulele fingerpicking as a guitarist:
-
Ohana TK-35G Tenor Ukulele (Solid Spruce Top):
Amazon | Guitar Center | Ohana Official Website -
Aquila Nylgut & Low-G Ukulele Strings:
Amazon – Nylgut | Amazon – Low-G | Sweetwater -
D’Addario Fluorocarbon EJ99T & Low-G Strings:
Amazon – EJ99T | Amazon – EJ99TLG Low-G | Guitar Center -
Ukulele Fingerstyle Instructional Books & Guides:
Amazon Ukulele Fingerstyle Books | Guitar Center Instruction Books | Sweetwater Ukulele Books
❓ FAQ

What are the basic fingerpicking patterns for ukulele beginners?
For beginners, the Claw pattern is the perfect starting point. It uses your thumb, index, and middle fingers to pluck strings in a simple, repetitive sequence—usually pinching the G and A strings together, then plucking the E string. This builds finger independence and introduces you to arpeggiated chords without overwhelming complexity. Gradually, you can add the C string and incorporate alternating thumb patterns for more rhythmic variety.
How can guitar fingerpicking skills be adapted to ukulele playing?
Guitarists already have a strong foundation in finger independence and rhythm, which transfers well to the ukulele. The key adaptation is understanding the ukulele’s re-entrant tuning and smaller fretboard. The PIMA finger assignments remain the same, but you’ll need to retrain your thumb to alternate between the G and C strings instead of the guitar’s bass strings. Also, finger pressure and plucking dynamics must be lighter due to the ukulele’s lower string tension.
What are the differences between ukulele and guitar fingerpicking techniques?
While both instruments use the PIMA system, the ukulele’s four strings and re-entrant tuning create unique challenges and opportunities. Ukulele fingerpicking often emphasizes pinching and simultaneous plucking of strings (like double stops), leveraging its bright, chiming tone. Guitar fingerpicking typically involves a wider range of bass notes and more linear tuning, allowing for deeper bass lines. Ukulele fingerpicking also requires a gentler touch and more precise finger placement due to closer string spacing.
Which fingerpicking exercises help guitarists transition to ukulele?
Exercises focusing on thumb independence (alternating between G and C strings), PIMA finger coordination, and arpeggio patterns are essential. Practicing simple scales using linear picking (ascending and descending through the strings) helps adjust to the re-entrant tuning. Additionally, working on simultaneous plucking of two strings (double stops) develops harmonic awareness. Slow, deliberate practice with metronome guidance is recommended.
How do chord shapes affect fingerpicking on the ukulele compared to guitar?
Ukulele chord shapes are often simplified versions or inversions of guitar chords, but the naming conventions differ. For example, a guitar’s D shape corresponds to a G chord on the ukulele. This affects fingerpicking because the harmonic context changes. Guitarists must learn to associate familiar shapes with new chord names and voicings. This can be confusing initially but becomes intuitive with practice.
What tips improve fingerpicking accuracy on the ukulele for guitar players?
- Keep your hand relaxed and floating rather than anchored to the soundboard.
- Use light, precise plucks to avoid buzzing or string noise.
- Practice finger independence exercises focusing on PIMA coordination.
- Slow down complex patterns and gradually increase speed.
- Use a metronome to develop steady rhythm.
- Experiment with nail length to find your ideal tone and attack.
- Familiarize yourself with re-entrant tuning by playing scales and arpeggios slowly.
Can guitar fingerpicking styles like Travis picking be used on the ukulele?
Absolutely! Travis picking adapts beautifully to the ukulele, especially with the alternating thumb pattern between the G and C strings. While the ukulele’s high-G string changes the bass feel, the rhythmic drive and finger independence of Travis picking remain intact. Guitarists will find this style familiar but will need to embrace the ukulele’s unique tonal qualities and string layout.
Additional FAQs
How does re-entrant tuning affect fingerpicking patterns?
Re-entrant tuning means the strings don’t progress strictly from low to high pitch, which affects how scales and arpeggios are fingerpicked. Patterns that work linearly on guitar may require adjustment on ukulele to accommodate the high G string’s placement. Embracing this tuning opens up unique melodic possibilities like the “campanella” effect.
Should I use nails or flesh for fingerpicking on the ukulele?
Both have pros and cons. Flesh produces warm, mellow tones, while nails offer brighter, clearer articulation and volume. Many players combine both, using short, well-maintained nails to add clarity without losing warmth. Experiment to find what suits your style and tone preference.
What ukulele size is best for fingerpicking?
Tenor ukuleles are generally preferred for fingerstyle due to their larger fretboard and fuller tone. Concert size is also suitable, especially for players with smaller hands. Soprano ukuleles have tighter string spacing and less sustain, making intricate fingerpicking more challenging.
📚 Reference Links
- The History of the Ukulele – Ukulele Magazine
- Understanding Re-entrant Tuning – Wikipedia
- Jake Shimabukuro Official Website
- Ohana Ukuleles Official Site
- Aquila Strings Official Site
- D’Addario Strings Official Site
- What is a good finger picking pattern for beginners? – Facebook Acoustic Guitar Players Group
- Ukulelego: 5 Fingerpicking Patterns You Should Know
We hope this guide lights your path to ukulele fingerpicking mastery. Remember, every great player started with a single pluck—now it’s your turn! 🎶